web design Archives -

Blog Archives

2019 Online Marketing Checkup for Small & Medium Businesses

Posted on January 10, 2019 by

laptop and stethoscope

Time for your online marketing checkup!

With 2019 now upon us it’s time to do a quick check of your online marketing assets. This is designed to be short and snappy but you will almost certainly find something useful.

SEO – Check your search engine rankings in Google

Put your browswer into incognito (Chrome) or private mode (Safari) and search Google for your main keywords or phrases. If you aren’t ranking on page 1, it’s time to take action! There are some free tools that do this but I’d recommend a manual check for this one-off instance.

Website technical – Check your online forms are working

Go to your website and complete all your online forms to check they are all working as expected. If any are broken or end up in your spam, take action to fix them right away so your don’t risk missing any enquiries.

Website technical – Audit your website for technical issues

Go to ScreamingFrog and run a site audit of your website. It’s free and will give you everything you need to know with regard to any technical issues that you have with your website that are negatively affecting your SEO. Fix these asap!

Website design – Look to see how your site compares to your competitors

How does your current website stack up compared to your competition? Is yours looking tired or old? Many visitors are put off by old or dated looking websites so be critical and take steps to improve or redesign it if necessary.

Responsive web design sign

Website technical – Is your site mobile friendly?

Use Google’s mobile friendly test and check that your site is mobile friendly. If it’s not then this is a problem that you need to fix right away as it’s a key SEO ranking factor for Google. It’s also very important that your site works well for anyone visiting your website on a mobile device (obviously!).

Branding – Is your branding consistent?

Check your branding across all your online and offline assets. Are you using the same branding and logo across your social media accounts, website, printed material, sign-work, vehicles etc? If not take action because your brand is important.

Website UX/UI – Audit your website user journey

This might sound arduous but it’s not. Put yourself in the shoes of a website visitor and check that they can easily navigate your website and get to everything quickly and easily. Also make sure that you have plenty of CTA’s (Calls To Action) on the key parts of your site.

Website SEO – Check your website speed

Use Google’s Page Speed Insights to check how your site performs across all platforms for speed. If you are getting a slow score for either Desktop or Mobile, or both, then take action to fix it asap.

Website SEO/Technical – Set up Google Analytics and Google Search Console

Hopefully, you already have Google Analytics set up on your website but you should also have Google Search Console set up too. Follow the links above or Google it and then follow the setup instructions and check out the user guides.

SEO – Optimise your Page Titles and Meta Descriptions

Find out who’s ranking well for your keywords and see if their page titles and meta descriptions are more interesting or engaging than yours. Also check your keywords are there. Click through rates are higher for well written titles and descriptions and this is a key SEO ranking factor.

Summary

Running through the points in this checklist will serve you well. You will be able to start the year off knowing that you’re in good shape online.

As always, we welcome your comments and feedback – just leave them below and we’ll get back to you. Otherwise, we hope you found something useful.


How to clear your browser cache

Posted on December 5, 2018 by

When you browse the Internet, with a computer or mobile device, your browser puts a small file for easy connection in a cache folder. They contain information from the sites you visit. These files can become a handicap if the authors of the sites change the presentation of their pages. At worst, a corrupted file can even prevent the download of the page. To fix these issues, empty the cache folder of your browser which may include any of the following: Chrome, Firefox, Edge, Internet Explorer, or Safari.

Clear cache from Google Chrome

Desktop

  • Open your Google Chrome browser. The logo is a red, yellow and green diaphragm with a blue circle.

  • Click the three dots. The button is located in the upper right area of the screen. A drop-down menu will show up.

  • Click More tools. This option is in the fourth part of the menu. A pop-up menu appears on the left.

  • Click Clear browsing data. This is the second option at the top of the menu. A selection window will appear on the screen.

  • Choose a time interval. Pull down the Time range list. To be sure to completely erase cache data, choose All time. Otherwise, you can sort the data by choosing, for example, Last hour.

  • Check the Cached images and files check box. This is the last box of the window. If this box is already checked, go to the next step. You can of course uncheck the other navigation elements if you only want to empty the cache folder.

  • Click CLEAR DATA. This is a blue button at the bottom right of the window. Chrome’s cache folder is now empty of any data.

Mobile

  • Open your Google Chrome browser. Touch the Chrome icon, which is a red, yellow, and green diaphragm with a blue circle.

  • Touch the three dots. The button is found in the lower right part of the screen. A drop-down menu will come out.

  • Touch on History. This option is found in the drop-down menu.


  • Touch Clear browsing data. The tab is in the lower left area of the screen. In Android, this option is almost at the top of the screen.

  • Tap on Cached Images and Files. In doing so, you display a blue check mark. If the blue checkmark is already present, proceed to the next step. Uncheck the other navigation items if you only want to empty the cache folder.

  • Touch Clear browsing data. The button is seen at the bottom of the screen. In Android, you can press Clear Browsing Data.

Clear cache from Firefox

Desktop

  • Open your Firefox browser. Its logo is a blue globe whose lower part is occupied by a red fox.

  • Click on three dashes. The button is in the upper right corner of the window. A drop-down menu will appear.

  • Click Library. This option is in the fifth section of the drop-down menu.

  • Click on History. This is the third proposition of this menu, represented by a watch.

  • Click Clear recent history. The button is almost at the top of the menu. In this window, you will find the mention of the cache, but also other elements.

  • Select a time interval. Click the Time range to clear drop-down list, and find and click Everything on the menu. Depending on your needs, you can choose another time interval, for example Today.

  • Check the Cache box. Simply click on the small empty square to the left of the caption. If this box is already checked, go to the next step. If you only want to clear the cache, uncheck all the other boxes in the ‘ Details ‘ section.

  • Click Clear now. The button is at the down part of the window. The Firefox cache folder is now empty.

Mobile

  • Open your Firefox browser. Touch the Firefox icon, which is a blue globe whose lower part is occupied by a red fox.
  • Touch the three dashes. The button is in the lower right corner of the screen. A menu will appear. In Android, tap in the upper right corner of the screen.
  • Touch Settings. It is on the right side of the menu that appeared.
  • Scroll down and touch Clear my tracks. It’s in the Privacy section that you will find this button. In Android, Erase My Traces is in the middle of the screen.
  • Touch the white slider labelled Cache. This slider is roughly in the middle of the page. If you touch it, it will change colour, the cache folder is ready to be emptied. If the cursor is already blue, go to the next step. With an Android device, you must check the Cache box. If you only want to clear the cache, disable the other blue cursors so that they appear in white.
  • Touch Clear my tracks. The button is at the bottom of the screen. In Android, tap Clear my tracks at the bottom of the screen.
  • Touch OK at the desired time. The cache folder of your Firefox browser is now empty. This step does not exist in Android: it is automatic.

Clear cache from Microsoft Edge

  • Open your Microsoft Edge browser. Its icon is the lowercase letter “e” in dark blue.

  • Click on the three dots. The button is in the upper right corner of the window. A pop-up menu appears on the screen.

  • Click Settings. This option is at the bottom of the context menu.

  • Click Choose what to clear. This option is right under Clear Browsing Data. Scroll down to see the option in question.

  • Select the Cached data and files. It’s about in the middle of the list that you have in front of you. If this box is already checked, go to the next step. If you only want to clear the cache, uncheck all other boxes in the list.

  • Click Clear. The button is about in the middle of the menu. In doing so, you will empty the Edge cache of its contents.

Clear cache from Internet Explorer

  • Open your Internet Explorer browser. Its logo is a light blue “e” with a sort of yellow comet wrapped around it.

  • Click on the gear icon. This is in the upper right corner of the window. A drop-down menu will appear.

  • Click Internet Options. This option is at the very bottom of the drop-down menu.

  • Click on Delete. The button is on the right side of the Internet Options window, in the Browsing History section. If you do not see this, first click the General tab at the top of the Internet Options window.

  • Check the boxes in the cache. The two Temporary Internet files and website files and Cookies and Website Data boxes must be checked. If these two consecutive boxes are already checked, you have nothing to do, it’s perfect. If you want to empty only the cache folder, you can uncheck all other boxes on the page.

  • Click on Delete. This button is at the bottom of the window. Doing so will remove the contents of the Internet Explorer cache folder.

  • Click Apply, and then click OK. These two buttons are at the bottom of the page displayed on the screen. In doing so, you save the changes made and exit the Internet Options window.

Clear cache from Safari

Desktop

  • Open your Safari browser. In the Dock of your Mac, you will find its icon: it is a blue compass with a white and red needle.
  • Click Safari. You will find this menu, written in bold, to the left of the menu bar. A drop-down menu will appear.
  • Click Preferences. This is the third option of the Safari menu. Logically, the preferences window is displayed on the screen.
  • Click the Advanced tab. This option is at the far right of the preferences window.
  • Tick the right box. Check the Show Development Menu box in the menu bar at the very bottom of the Preferences window.
  • Close the preferences window. Check at the top of your screen that the Development menu appears in the general menu bar.
  • Click on the Development menu. This is at the top of the screen. A drop-down menu should appear.
  • Click Empty Caches. Look for its location roughly in the middle of the drop-down menu. You will have to confirm your order. To do this, click Empty Caches or OK (or any other formula of this type).

Mobile

  • Access the settings of your iPhone. They are represented on the home screen by a grey icon containing a gear. The settings page appears on the screen.

  • Scroll down and tap Safari.

  • Scroll down and touch Clear History and Site Data. This blue link is at the very bottom of the screen.

  • To finish, touch the red link Delete. The data in the Safari cache folder on your iPhone is deleted.

It is strongly recommended when you delete data on a browser to close the browser after the procedure and run it again to finalize the deletion. Removing the cache folder from a browser has nothing to do with removing cookies.

Once the cache is emptied, it is normal that access to the sites is a little slower: the browser starts loading data again.


The Website Development Process: A 6 Step Guide

Posted on March 21, 2018 by

Website Development Process

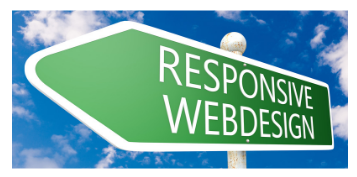
What is Website Development Process?

Website development is a comprehensive process that consists of essential steps that need to be followed. There isn’t a specific number of steps as it may vary depending on an agency or a developer, however, the basic process is pretty much the same.

Web Development Process Model

We like to make things as clear as possible. Somebody who’s new to working alongside a digital agency may particularly struggle to understand the language developers speak. What terms will you come across while working with the web agency? We’ve created a cheat sheet with the terms that are used the most, so go ahead and download our cheat sheet!

download here

The Website Development Process

Website Development Checklist

1. Identifying goals and purpose

Just like any other project, the very first step of developing a website is gathering all the necessary information. All the expectations you have from a website need to be clarified at the beginning of the project otherwise the whole project might set off in the wrong direction.

Identifying goals in website development process

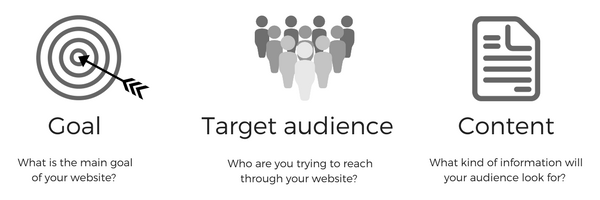
These are some of the aspects that need to be considered. The website’s purpose, goal, target audience and the information provided on a website will have a huge impact on what technologies will be implemented and what functionality the website will benefit from at the final stage. What is the goal of developing this site? Is it to drive more sales, create brand awareness or sell products directly from a website? The website whose purpose is to sell cars will have different functionality than the one specifically designed to inform. And the design of the website will reflect the type of audience.

Bear in mind, it’s very important that everything is agreed at the early stages of the project. Any changes that have not been agreed will require an increase in timeline and budget.

2. Planning

How do you plan a website development?

At the planning stage, we decide what kind of technologies will we use for developing a site, e.g. what CMS will be used and also, we give you an idea of how the website will look. We create a sitemap for the website which is then followed by creating a wireframe. The major difference between these two is:

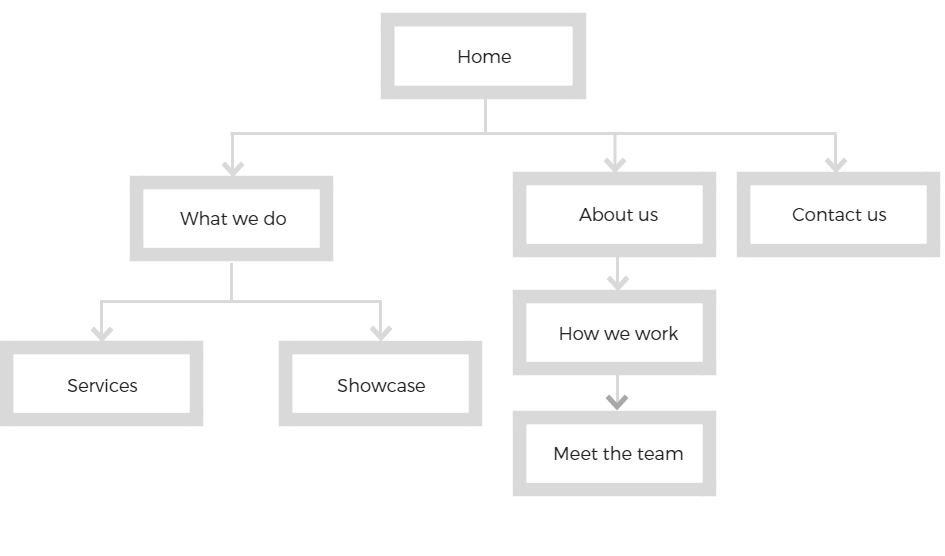
Sitemap represents a relationship between the main areas of the website and its content. A sitemap could be referred to as a table of contents for a website, showing off the future site’s navigation. While creating a sitemap, we have to consider things like; how easy will it be for an end user to find a piece of information he’s looking for from the main page? Or how easy will be to navigate the site? Keeping the end user in the heart of the process, we aim to plan a site that will be as user-friendly as possible.

Example of a sitemap for a simple website:

Sample website structure

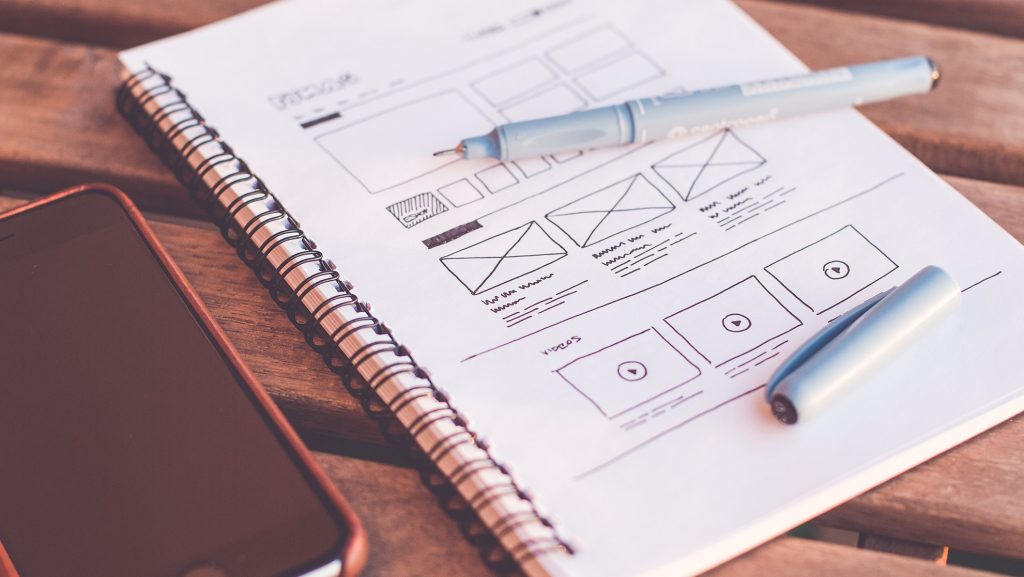
The wireframe gives you a better understanding of what the website will look like visually. Although there are no actual visual elements used (no pictures, no logos, no colours, etc.), it gives you an idea of what will be the layout of the website. It will show where on a page will we display text, photos, etc. Once you are happy with the layout of the pages we have presented, we can move on to the next stage – designing the website.

Example of using pen and paper: (The wireframe doesn’t have to be done in any expensive software, the layout of the page can be simply drawn on a piece of paper)

wireframe of a website

3. Design

This stage allows designers to show off what they’re great at. The possibilities to design a fantastic looking website are endless.

What should be kept in mind when designing a website?

Target audience
Who will be using the site? A website aimed to target young teenagers will (and should!) look completely different from the one that’s offering financial support to businesses.

Branding
All the branding elements (logos, colour, font) have to be in place with the current branding.

Designing and developing a new website is not only about the way the website looks as there are many other important elements like functionality, speed, etc. However, it is important because the website represents your brand. It creates a perception in customers’ minds about the brand, having an impact on whether they will decide to use your products/services or not.

Keeping these important elements in mind, we start with designing the whole website (what to you might look like a ‘ready to go’ website, however, at this stage the website is not functional – it is just a proof of the design). Once you are happy with the design and ready to sing it off, we can move the proof across to our developers who will start to develop the actual site.

4. Development

How is Web Development done?

And if you wonder how is web development done, here’s how it begins – after goal setting, planning and designing. The proof of the design we’ve seen in the previous stage will turn into a fully functional website which will be ready to go live very soon. The development process involves the programming work as well as loading content onto the site.

The sitemap we have created in the planning stage will help us actually build the site. We’d usually start with a home page and add all the subpages afterwards. From the technical point of view, in the development process we make all the elements of the website work properly, e.g. contact forms, payment gateways or functionality that were agreed earlier are being developed at this stage.

Once we build a site, we load all the content onto the site. Either a member of our team will do so, or you might prefer to do it yourself – whichever is more suitable.

5. Testing and Launch

Once a site has been built, there’s one more crucial step to be taken before the site goes live – testing. The reason for testing the site is to find if there are any issues, e.g. broken links that need to be fixed. Everything on a site should be tested – all the links, all the forms, all the scripts, even the content. It’s always better to fix the issue before we launch the site, rather than to launch a site that doesn’t work properly!

Once your site has been tested, we upload it to a live server and we are ready for the most exciting step of the development process – launch!

6. Maintenance

Once we launch the website, remember – it is not a product or service that once delivered, our job ends there. Websites need to be looked after and maintained the whole time they’re in use, e.g. with security updates to keep the site fully secure. If you use a CMS system, you want to do regular updates in order to prevent the site from any bugs, etc.

A great way to keep the site well maintained is a maintenance pot. We’ve been offering this service to our customers for many years and from our own experience, it is one of the easiest and most effective ways to keep the sites we’ve built up to date. We offer our customers a maintenance pot that they can top up anytime they like (with no expiry date). So once you wish to make any changes to the website or your website needs some updates, we simply take the time off from your maintenance pot – assuring you only pay for the actual time it takes us to do the job.

BONUS

Grab this Website Development Process as a PDF.

Are you interested in having a new website developed for your business? Or perhaps you need to make some changes to your current one. Either way, don’t hesitate and contact Web-Feet today!


Google’s reCAPTCHA is now Completely Invisible

Posted on March 13, 2017 by

Google’s reCAPTCHA service has helped to weed out fake traffic (which costs advertisers billions every year) and stop bots from maliciously submitting forms on the internet for years. However, the awkward letters and numbers were often difficult to read and could even deter users from completing a form. Google’s latest version of reCAPTCHA is now completely invisible to users, and instead works in the background to automatically detect if someone is a human or a bot.

Continue reading →


Why Does Your Site Need To Be Responsive?

Posted on October 2, 2016 by

There are now more mobile devices on Earth than there are people – and as almost 60% of all website traffic comes from these devices, it’s never been more important to make sure your site is designed and developed with mobiles in mind. A responsive design means your site can be used and enjoyed by users on any sized screen or device – which will not only give your users a better experience, but also boost your SEO.

Responsive

Continue reading →


Some of our happy customers

logo ahmad
logo poingdestres
logog swiss
logo ibhs 1
ww
logo sgc
logo nationwide
logo undersea
logo roughton
logo stcross
logo pulse
logo mm
logo jfl
logo heritage 1
logo firesafe
logo electrofreeze
logo clickmetal
logo baguetti
bpc
logo ccc 1
log arokah
logo labs
logo paragon
logo trant
logo nahh
logo edge
logo romsey
ace1
ace2
spaceway logo
logo bookharbour
logo chartco
logo cranbourne
logo magister
logo mgmetals
logo westway
logo ocean
logo testvalley
logo brittania
logo faac
recref
logo gss